Sometimes you need to change information in your Google Shopping feeds, but you don’t want to make the changes on your website. Google Merchant Center custom feed rules make it possible, one by one or in bulk.
You can use custom feed rules to change or add required data and populate custom columns using simple logic statements. For example, these common tasks can all be accomplished with custom feed rules.
- Adding Promotion IDs: If you are starting up a Black Friday sale and need to insert promotion IDs for a handful of products, you can set a rule to do so. Set the condition to select only the products that the promotion applies to, and create a rule to set to the promotion ID.
- Making Title or Description Changes: Because these are the first product listing attributes that Google’s artificial intelligence looks at, optimizing your titles and descriptions could make a big difference in how your ads perform. You could set a rule to append brand names or product types to better fit what people are searching for.
- Inserting Custom Labels: Adding in custom labels is a way to segment your shopping campaigns and ad groups by specific attributes, such as top sellers, age groups, or really anything that distinguishes groups of products from each other. This attribute does not affect ad performance, but does help with structuring your campaigns and ad groups in finer tuned methods.
Custom feed rules are extremely versatile, allowing you to change or edit every attribute in your shopping feed. While they are more commonly used with primary feeds, they can also be created for supplemental feeds.
The process of creating a custom rule for your feed is as follows:

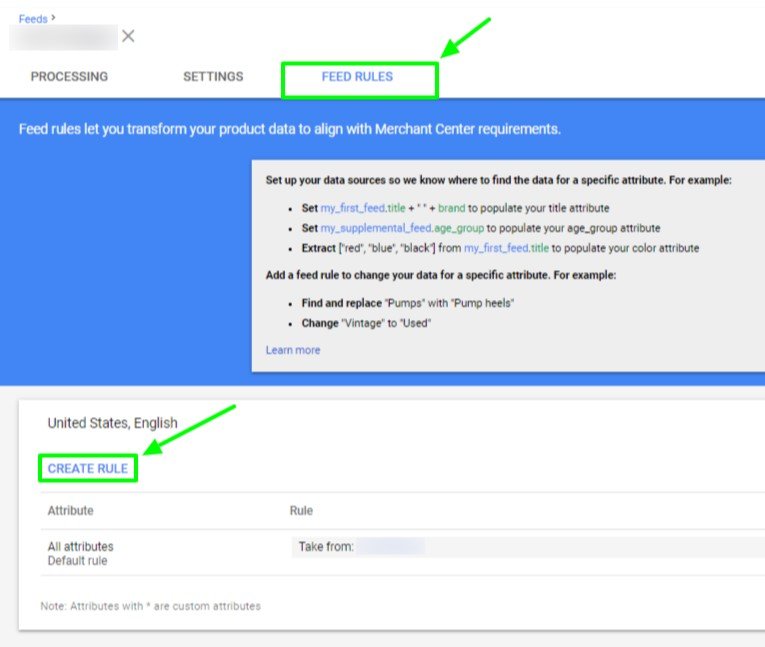
- Under the “Products” tab, select “Feeds.” Then select your primary feed, as shown below.

- Select the “Feed Rules” tab to show all of the rules in place for that feed. If there are no rules applied, you should see one labeled “All Attributes.” You’ll also see a few examples of rule changes presented in the blue box above the rules. Click on “Create Rule,” then type in the attribute you want to edit or add in. In the example below, I used “Title.”
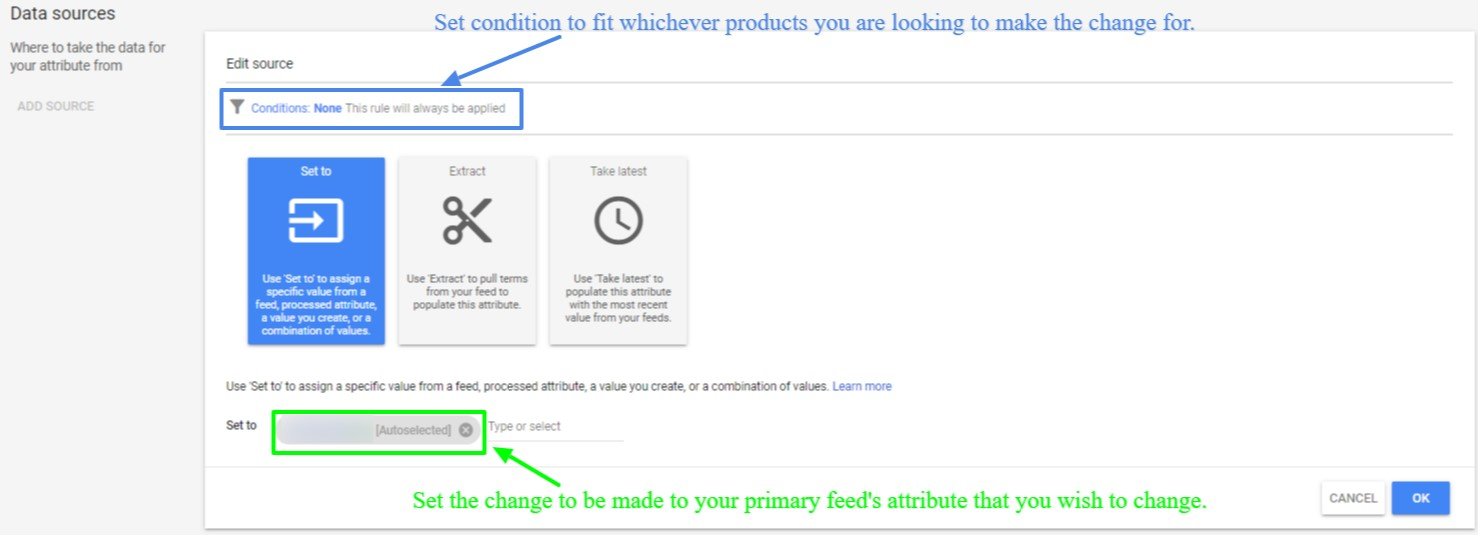
- Fill out the “Data Sources” section to determine where the data should be taken from for that attribute, as shown below. This can be manipulated in any way you see fit, by setting specific conditions that must match in order for the rule to be implemented. In this example, no conditions need to be met, meaning that it applies to all products within this feed. The attribute will be changing the primary feed’s “Title” attribute.
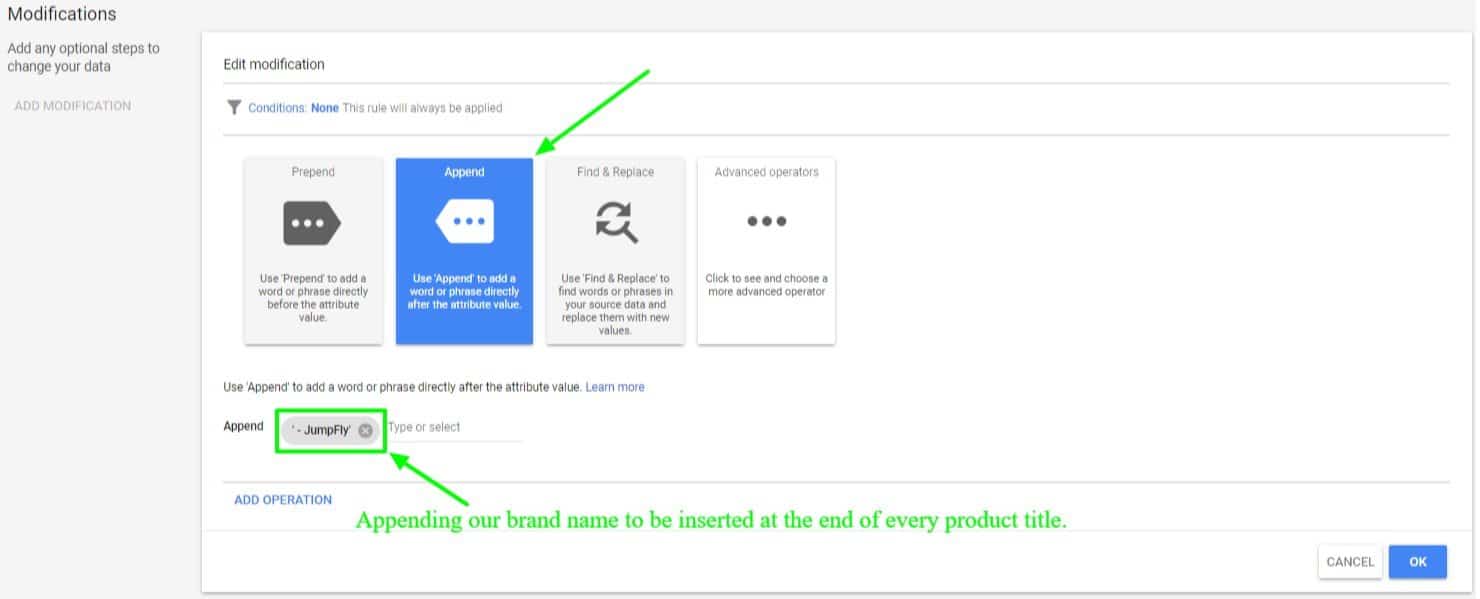
- Optionally, you can also implement “Modifications” if you want to edit a pre-existing column by prepending, appending, or finding and replacing sections of text within your feed, as shown below. In this example, we will be appending the following characters and brand name to the end of all product titles: “ – JumpFly”.
- A preview of your changes will be shown on the right-hand side with a few examples that will be changed. This is a quick way to see if the changes are being implemented correctly.
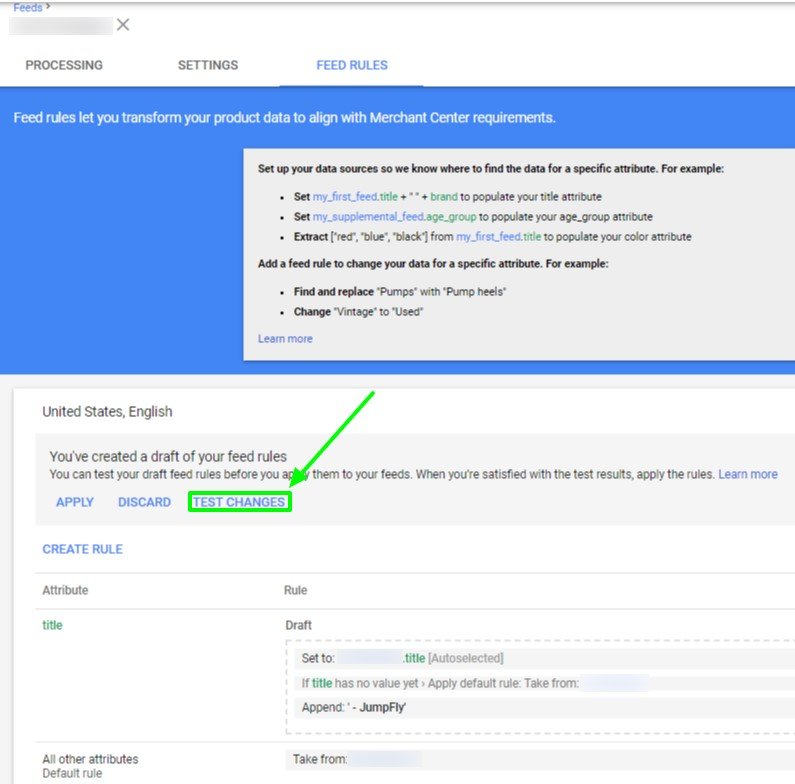
- Click “Save as Draft,” which will send you to the screen shown below, giving you the option to “Apply,” “Discard,” or “Test Changes.” Click “Test Changes” to test the results before applying the new rule to your campaign. This allows you to reassure yourself that the changes you made are being implemented correctly.
- After five to 10 minutes, you will have the option to view the test results. Click on “Show Test,” as shown below. You’ll see the number of products affected by the custom rule, and whether any new disapprovals are created due to the rule.
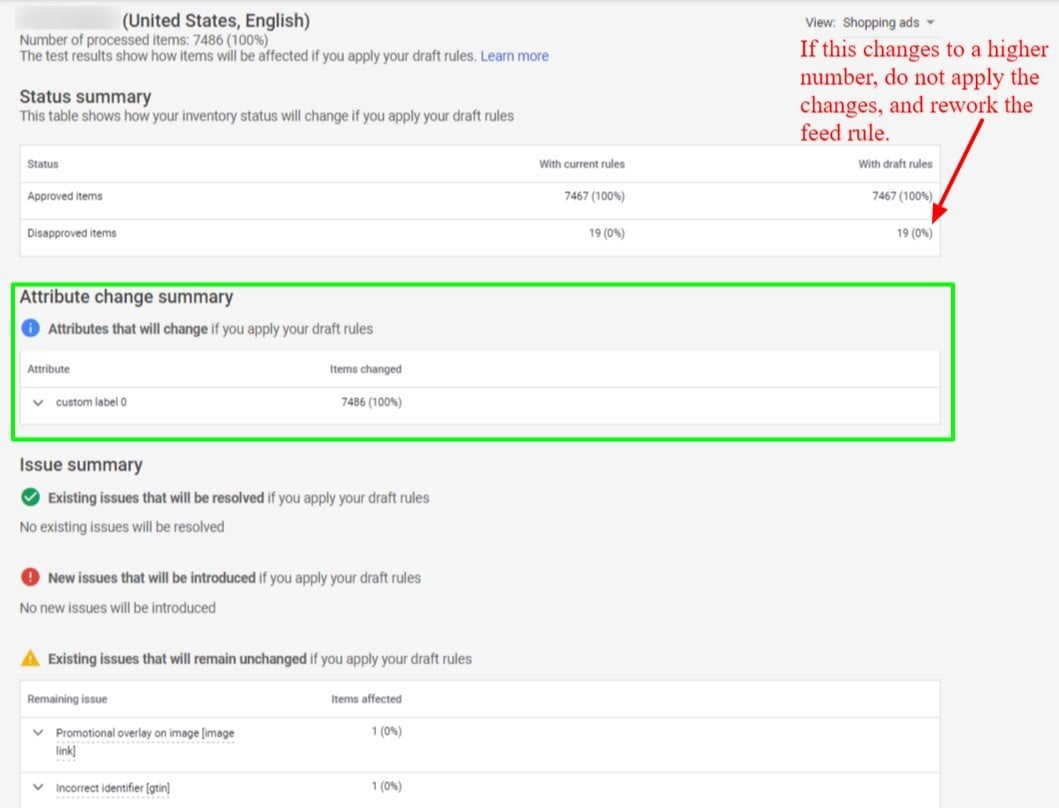
- After reviewing your test, if everything is acceptable, go back to the prior page and click “Apply.”
Feed rules can be made to manipulate or change any attributes within your feed, for a select number of products or all of them. Applying more complex feed rules may take some trial and error. Test every custom feed rule before applying it to be certain it will have the impact you want on your shopping campaign.