Uploading product data into Google Merchant Center can be very simple … or complex, depending on the platform you use for your website.
Some ecommerce platforms make it easy to import products from your store to Google Merchant Center. They may have a widget or app that is specifically made for that purpose, or they may — like Shopify — integrate directly with Google Merchant Center. In others platforms, it’s more complex: You may have to format the feed to follow Google’s Shopping product data specifications and upload it manually on Google Merchant Center.
Follow these five steps to submit your product feed manually.
- Under “Primary Feeds,” click the plus sign to add a feed.
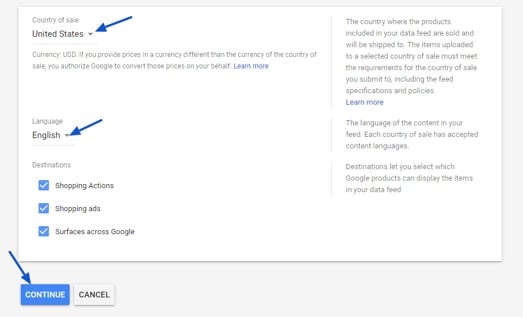
- Select the country and language for your product feed. Note that the country setting also determines the default currency. Choose at least one destination, as shown below, to enable your Shopping ads to show. Then click “Continue.”
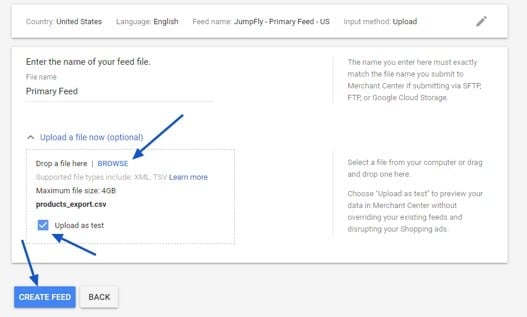
- Give your feed a name and choose from the following options to deliver it to Google Merchant Center:
- Google Sheets: You’ll make updates to your product data in a Google Sheet, and they’ll automatically be applied to your account.
- Scheduled Fetch: You’ll host a file on your website that contains data and schedule a regular time for Google to fetch updates. Updates are only applied to your account when the fetch occurs.
- Upload: You’ll keep a file on your computer that contains data and regularly upload it to your account through SFTP, FTP, Google Cloud Storage, or a manual upload.
- Content API: The Content API for Shopping enables you to automatically upload product listings and so make your products easily discoverable through Google Shopping.

- Follow the instructions to complete the product data feed connection. Because I chose “Upload” in the previous step, the image below demonstrates choosing an Excel file to upload. Check the box to upload the file as a test to make sure you have all the necessary data in your feed before posting the changes live. Then, click “Create Feed.”
- Test your feed. You will be brought back to the feed management page, where you can click on the feed you just connected to check the progress and see if there are any errors that you need to fix. When you’re done, apply the changes and your feed will push live.