It’s estimated that your typical online store loses about 75% of overall sales due to cart abandonment, and the number one cause of cart abandonment among online shoppers is unexpected shipping costs. Making sure your shipping costs are accurately reflected in your Merchant Center account is crucial. You don’t want to scare off a potential customer due to an inaccurately high shipping cost shown because of a poor setup. That’s not all, though. If your shipping costs in Merchant Center aren’t equal to or greater than the shipping costs on your site, you could face product disapprovals or even account suspension!
Because there are so many ways a business can go about determining shipping costs, it’s possible that it could be impossible for you to show correct shipping costs in your Google Merchant Center (GMC) account. In those cases, it’s best to overestimate your shipping costs in GMC. You may scare off a few more customers, but your account won’t be suspended, and your products will not be disapproved. Google will only disapprove products that show lower shipping costs in GMC than on your site.
In most cases, though, you probably won’t have this trouble, especially if you use this blog to get it set up correctly in the first place! So let’s get started.
There are two ways to set up shipping:

- At the account level by creating a Shipping Service directly in GMC.
- At the product level, using the Shipping Attribute in your product feed.
First, let’s go over how to create a new Shipping Service in GMC.
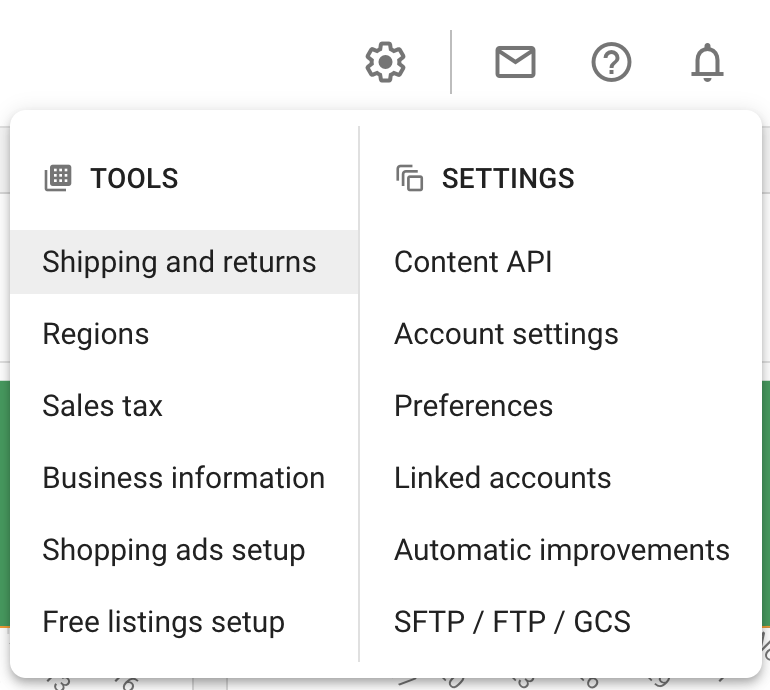
To get started, go to the Gear in the top right corner, then select Shipping and returns under Tools.
You’ll then select + New shipping service.

Service Coverage
You’ll have to name your shipping service and select the country and currency you want to use. The country and currency should match what you have in your product feed. While the main country needs to match what’s shown in your feed, you can also add any additional countries you ship to as well. Even if the additional countries use a different currency, the cost will be converted automatically to the correct currency. You can read more about shipping to multiple countries here.

Delivery Times
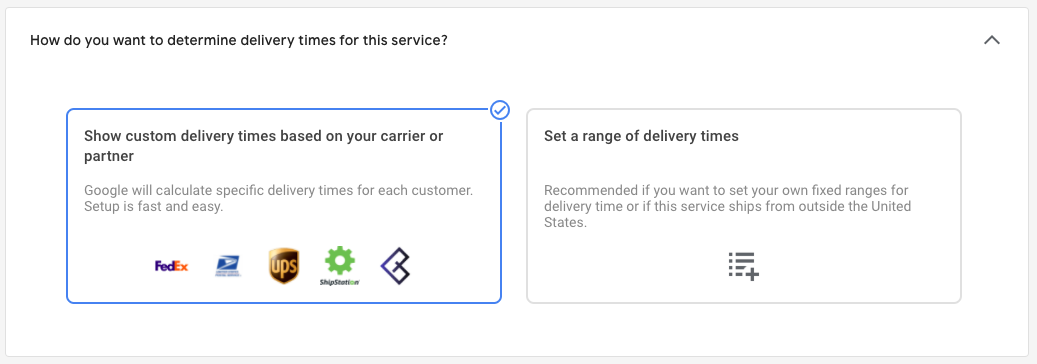
Next, you’ll have to enter delivery times. You can either choose to show custom delivery times or set a range of delivery times.
Choosing custom delivery times lets Google calculate and estimate for you based on your carrier or partner. Google will use the customer’s location and your warehouse location to give an accurate estimate of shipping times. You can read more about letting Google calculate your shipping speeds here.
Setting a range of delivery times involves a few more steps.
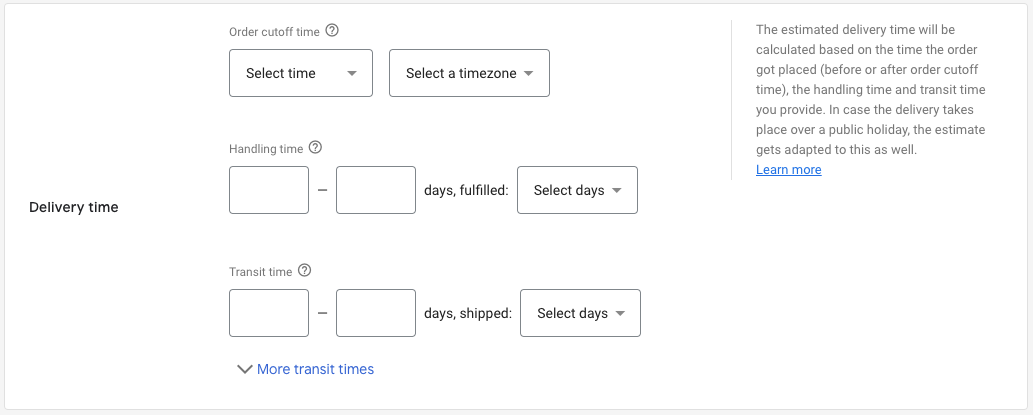
Order cutoff time is the time of day orders must be placed by in order to be processed that same day.
Handling time is the time in business days between the order being placed and put out for delivery. You can enter 0-0 if you offer same-day shipping.
Transit time is the time it takes for the carrier to deliver it to the customer.
You also have the ability to create separate transit times for different locations under More transit times. Say, for example, you’re an east coast company. It might take longer for you to ship to the west coast than it would to the midwest.
Holiday Shipping Cutoff
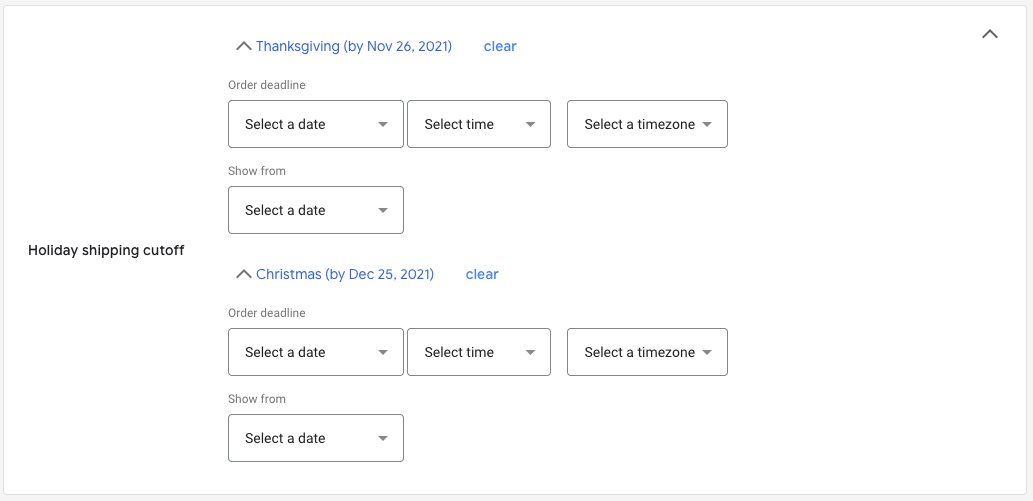
Google also gives you the option to show customers order deadlines to ensure that their purchases will arrive before certain holidays. The following holidays are offered: Valentine’s Day, Easter, Mother’s Day, Father’s Day, Independence Day, Halloween, Thanksgiving, and Christmas.
So after you have set up your service area and configured your delivery times, it’s time to put in your shipping costs. You can choose Google’s basic settings or switch to advanced settings if your shipping method is a little more complicated.
The basic settings consist of five options.
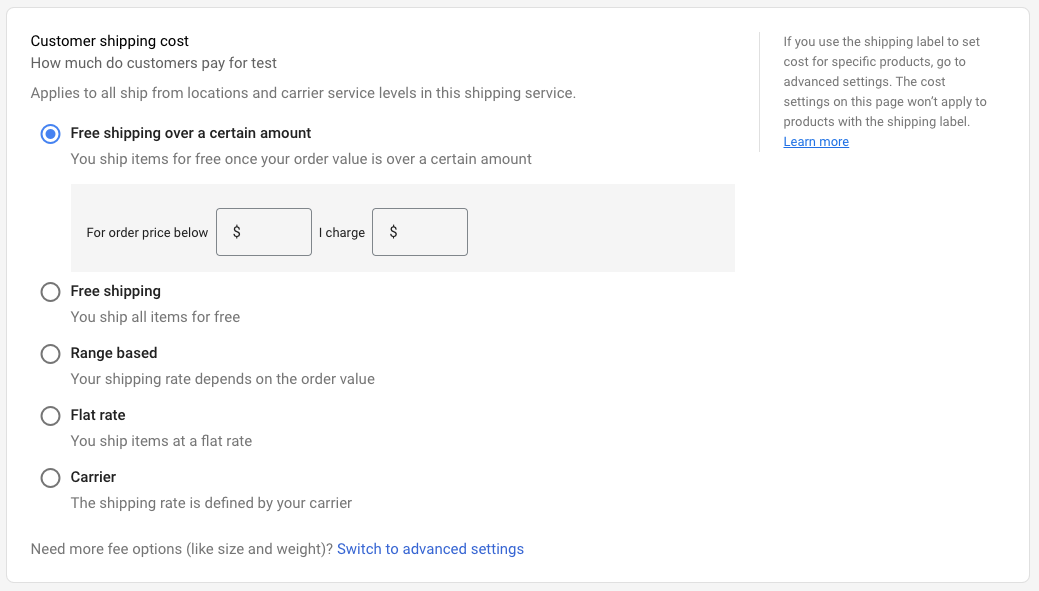
Free shipping and Free shipping over a certain amount: These first two are pretty self-explanatory. If your company offers free shipping, your setup is done at the click of a button. If you have to hit a certain price threshold for free shipping, you enter that price threshold and the price you charge if orders are below that threshold.
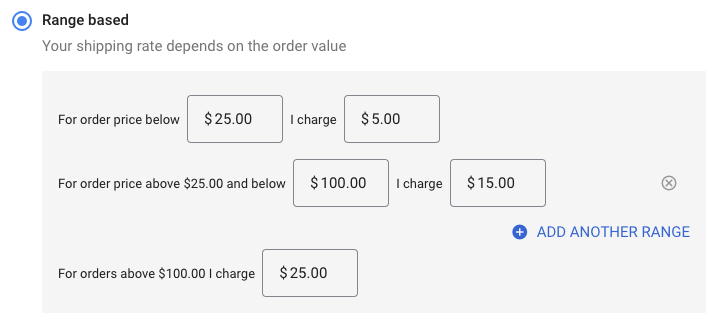
Range based shipping allows you to break down your shipping price into tiers based on order value.
Flat rate is also self-explanatory. Use it if you charge one flat rate for all your products regardless of price or destination.
Carrier is defined by whichever carrier you use – FedEx, UPS, or USPS. You would enter the origin postal code; you can also adjust the rate by increasing the cost with a percent adjustment or a flat dollar amount adjustment. This is nice in the scenario that the carrier rates don’t exactly match the shipping costs reflected on your website. You can mark the costs up to ensure that the price in Google Merchant Center is higher than the price on your website. Which, as we discussed earlier, will prevent Google from hitting you with any suspensions or disapprovals.
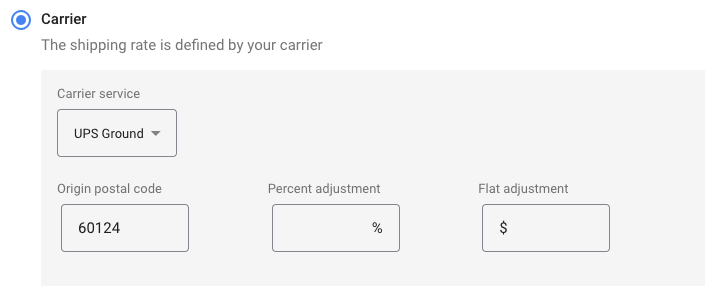
To use carrier rates, you also will need to add some shipping dimensions to your product data feed. It can be calculated based on shipping weight or dimensionally using the weight, as well as shipping length, shipping width, and shipping height. You can also set-up Carrier rates for multiple services or even multiple carriers, like UPS Ground and UPS 3 Day Select, or UPS Ground and FedEx Ground.
If none of those options suffice because your shipping method is more complicated than any of these examples, you will switch over and use the advanced settings.
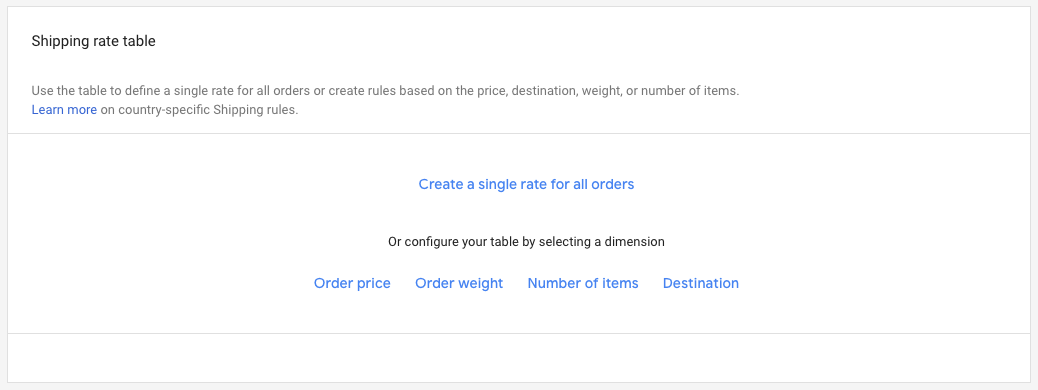
In the advanced settings, you can create shipping rate tables to combine factors like order price, order weight, number of items, and destination to get the exact right shipping cost for each and every scenario.
You can also use shipping labels to create groups of products that have similar shipping costs like perishables or oversized items. When you create a shipping rate, you can choose to apply it to all your products or filter by the shipping label.

Below is an example of a shipping rate table broken up by destination and order price. It shows how you would handle shipping if you offered free shipping at a certain price point but only within the 48 contiguous United States. Considering that it is often more expensive to ship to Hawaii and Alaska, this seems like a frequently occurring scenario for businesses across America.
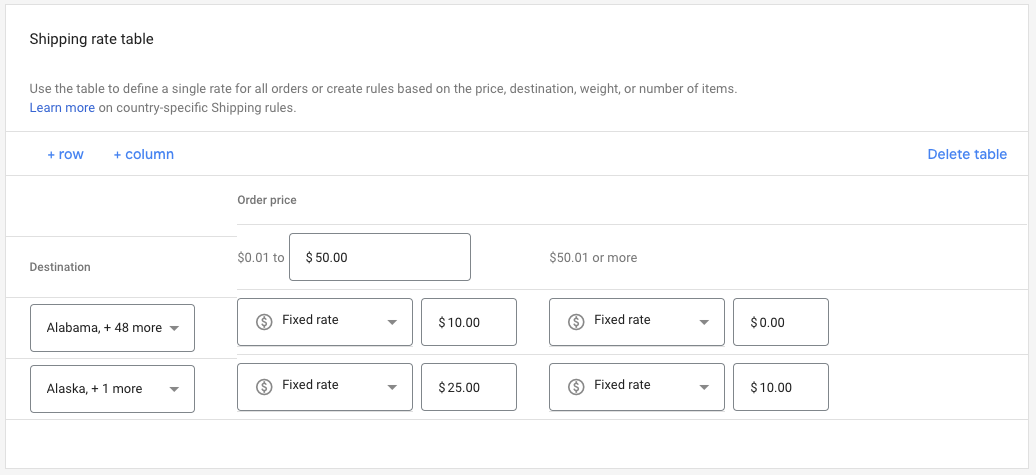
Destinations make up your rows and are selected on a state-by-state basis or by using postal codes. Order price makes up the columns and is broken down into two categories. You can see there’s an option to add more rows and columns, giving you the ability to put in a certain shipping cost for lots of different scenarios.
For each of those scenarios, the price can be determined in a number of ways.
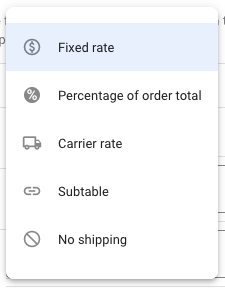
You can charge a fixed rate, percentage of order total, carrier rate, subtable, or no shipping. We’ve covered some of these already, so I won’t explain them again. It is important to note that no shipping does not mean free shipping. It is for scenarios where shipping is not offered.
Subtables are used when shipping is dependent on more than two variables. You can read more about shipping with subtables here.
And that’s pretty much it when it comes to shipping setup options in Google Merchant Center. However, as we discussed earlier, you also have the option to set up shipping at the product data feed level using the shipping attribute.
The Shipping Attribute
Populating the shipping attribute in the product data feed will override all of the settings of the shipping service you have set up in the Merchant Center. This includes things like transit time and handling time. You’ll need to use sub-attributes to define those traits you’ve overridden, like transit time and handling time; otherwise, you might see some errors. You can read more about the shipping attribute and its various sub-attributes here. Oftentimes, people will only use the shipping attribute for products of special circumstances like bulky or fragile products.
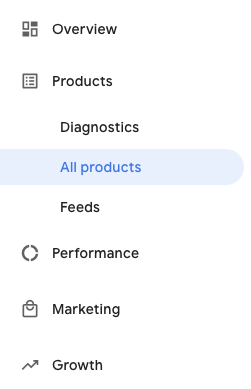
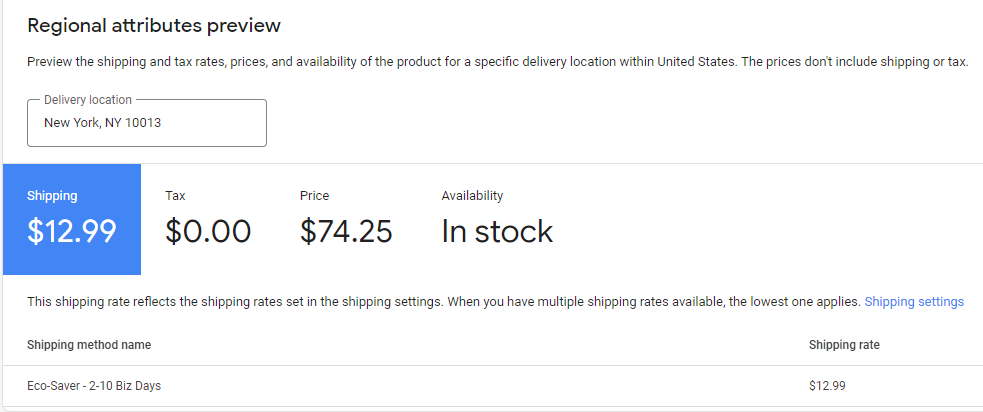
After you’ve got all of your shipping settings in place, you can test if prices are accurate by going to the products page in Google Merchant Center, selecting a product, and if you scroll down a bit, you’ll see the price. You can also test to see if your location-based rules put in place are accurate by typing in various zip codes and states in the Delivery Location section. The price will update accordingly.
‘Tis the season of shopping. May your carts never be abandoned and your shipping costs always be shown to customers with pinpoint accuracy.