Google Ads Experiments are a great, and perhaps underutilized, tool for any pay-per-click (PPC) advertiser. Using experiments you can test specific changes to your campaign to see how those changes perform. Experimenting allows you to try out new ideas or strategies without compromising the performance of your original campaign. Think of experiments like dipping your toe into the water at a pool party to test the temperature before heading to the diving board.
Google Ads Experiments bring a higher level of accuracy than regular A/B testing as they operate similar to a true scientific experiment. You develop a hypothesis, determine what variable you want to test, and then compare the results to a control group. So how does it all work?
Step 1: Create a Campaign Draft
The first step in setting up a Google Ads Experiment is to create a campaign draft. A campaign draft is essentially a duplicate of your existing campaign. To create a campaign draft, sign in to your Google Ads account and go to the “Drafts & experiments” tab found on the sidebar of your Google Ads user interface (UI). You might have to expand the “More” button and scroll to find it as it is located towards the bottom of the left navigation menu.

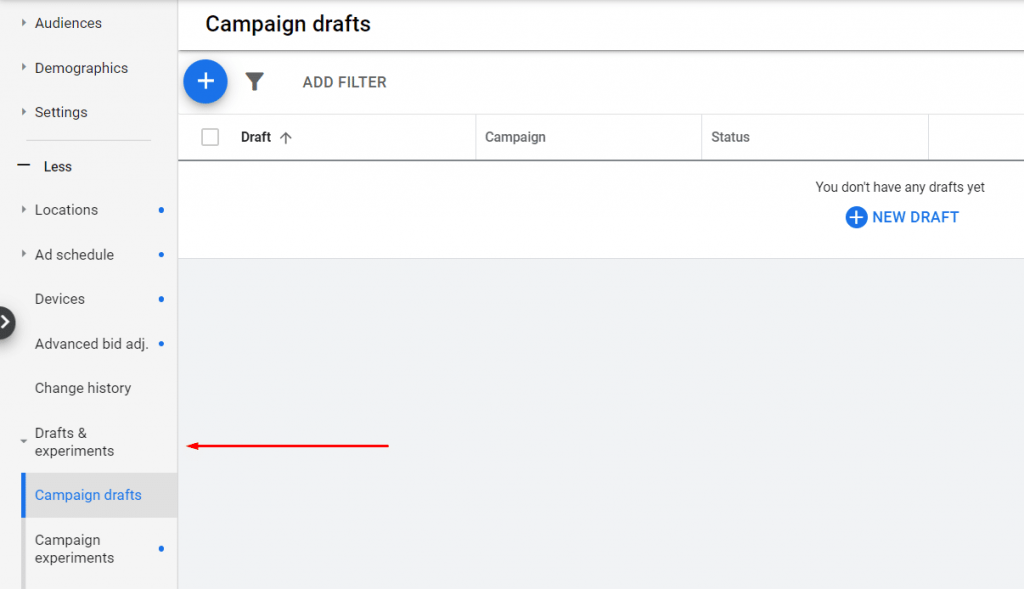
It’s important to note that you can only create drafts and experiments for search and display campaigns. If you were hoping to run an experiment for a shopping, video, app, or discovery campaign you won’t be able to at this time.
Step 2: Update the Testing Variable
After creating the draft, update the variable that you want to test. Making changes to your campaign draft is similar to making changes to a campaign in Google Ads Editor; any changes you make won’t be live until you either apply the changes to the original campaign or convert the draft to an experiment.
When running Google Ads Experiments you can test almost anything. Common items to test are smaller impact variables like landing pages, ad extensions, or ad copy (including headlines and description lines). These variables would likely have an effect on metrics such as ad rank, click-through rates, bounce rates, average session duration, and conversion rates.
You can also use Google Ads Experiments to test something larger like a new bid strategy — such as maximize conversions or target ROAS — which could have a much larger impact on your campaign. Whatever you decide to test, you should only test one variable at a time. Just like a scientific experiment, your results will be easier to understand if you know exactly which variable is responsible for the impact.
Step 3: Apply Your Campaign Draft as an Experiment
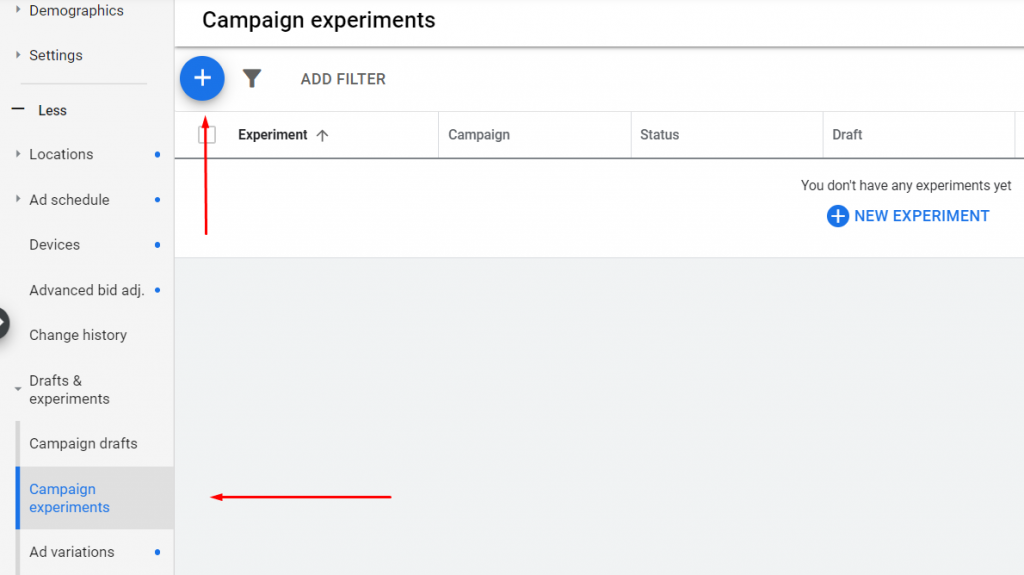
After you’ve made the appropriate changes to your campaign draft, it’s time to prepare your experiment. Below the “Campaign drafts” button you just used to create your draft, you’ll see a “Campaign experiments” button.
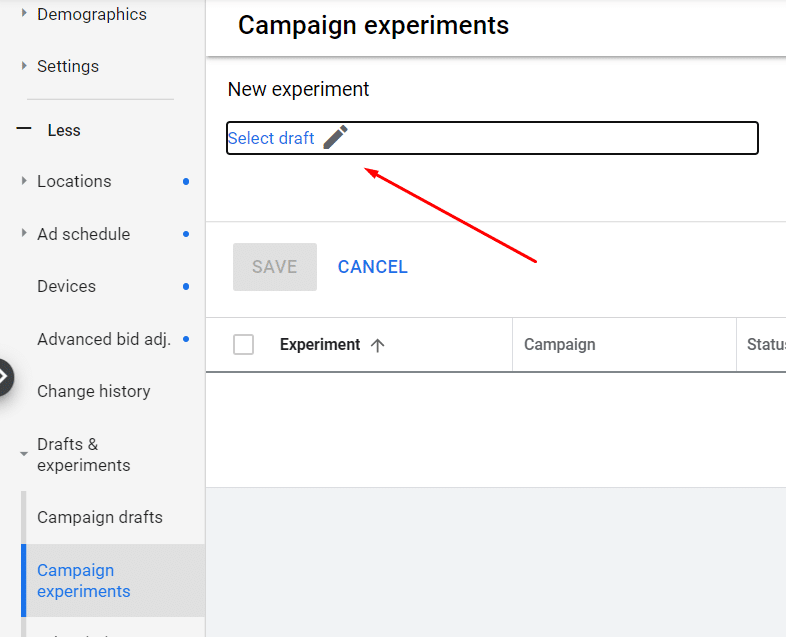
To create your campaign experiment simply click the “New experiment” button, then on the pencil icon where you select your campaign draft from the drop-down menu.
While you can create as many campaign drafts as you’d like, you can only run one experiment at a time. After you’ve selected your campaign draft your experiment is almost ready to run.
Step 4: Fill in All the Experiment Details
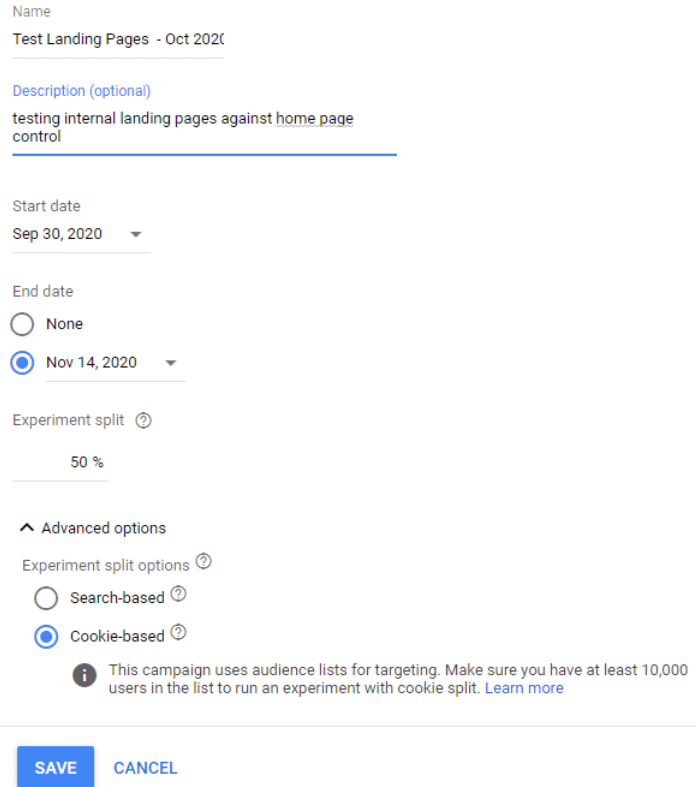
Just like you would pick specifics like a date, location, and guest list for a pool party, it is important to make sure these details are set up correctly on your experiments well.
Name Your Experiment: First, you’ll decide the name and description of the experiment. If you plan on making experiments a regular part of your Google Ads strategy, be very specific and provide plenty of information, including dates, in the name and description fields.
Choose the Timing: Next, choose how long you want your test to run before analyzing the results. Since your two campaigns — the original and the experiment — are running at the same time, this eliminates any discrepancies in performance due to things like seasonality.
Google recommends letting an experiment campaign run for at least two weeks so the machine learning can optimize itself. Personally, I recommend at least a four-week experiment unless the campaign has very high volume, in which case the two weeks might be enough. If your campaign doesn’t get a lot of volume, you may also need to increase the time to six or eight weeks.
Experiments can be turned off at any time and do not require an end date, but I do recommend entering one. Once the campaign is over you cannot re-enable it. If you get to the end of the experiment duration and decide you want to keep it running because the findings were inconclusive, you can add additional time, as long as it’s before the experiment has ended.
Select Your Budget Split: Your next step in creating Google Ads Experiments is to decide how much of your original campaign budget you want to allocate to the experiment. How often a potential customer will be shown an ad from your original campaign or your experiment campaign depends on how you split the budget between the two.
In order to keep the experiment concise and running with only one variable, I recommend a 50/50 budget split. This allows your experiment to occur in a budget vacuum with both campaigns receiving an equal amount of budget. That being said, if you are testing something major — like an automated bidding strategy — and you are worried about overspending, you may want to start with a 75/25 split.
Experiment Split Options: The last step in creating a Google Ads Experiment is choosing whether your experiment will be cookie-based or search-based. Cookie-based experiments ensure that an individual will only see one version of your campaign no matter how many times they search, unless they clear their cookies. (It’s important you have a large enough list to choose this option.)
The search-based option randomly assigns a campaign version every time a user searches. If you choose to use a search-based experiment the same person might see both versions of your campaigns.
Step 5: Launch Your Experiment

After you go through these steps to determine the duration, budget, and split options you’re ready to launch your campaign experiment! You’ll see a button near the top of your screen that says “Apply.” Click that and then a menu will appear. Select “Run an experiment,” hit Apply, and viola — your Google Ads Experiment is launched.
Step 6: Monitor Performance
Once your experiment is up and running, make sure to come back periodically and check the performance by going to the “Campaign experiments” tab. Here you will see a data table where you can easily analyze the results. This section also shows you statistical probabilities and confidence intervals, which are important to make sure you are analyzing the results properly.
It’s important to make sure that you give your experiment the full time of testing. Don’t kick people out of the pool until they are fully done swimming. I’ve seen experiments that skew one way or the other at the beginning of the time frame, and completely change course once a longer amount of time has passed and data has accrued.
Once you’ve concluded the experiment, if you are pleased with the results you can go ahead and apply the changes you made in the campaign draft to the original campaign. On the other hand, if the results are not optimal, you’ll have your data without compromising your original campaign. If the findings are inconclusive before the experiment time frame has ended, you can always let the experiment run for a bit longer (but only if the experiment hasn’t ended yet).
Considering the whirlwind of a year that 2020 has been, being cost-effective is more important than ever. While you should always be looking to tweak and optimize your campaigns by trying new methods and strategies, Google Ads Experiments allow you to test the waters and wade around in the shallow side of the pool, instead of jumping into the deep end and hoping you can figure out how to swim.